Saturday, December 31, 2011

Homemade Picture Display

I hope you all had a fabulous Christmas, I know I did!  One of the highlights of my Christmas day was getting to talk to my brother and brother-in-law who are currently serving missions for our church.  We had sent a package to each of them a couple weeks before Christmas so this was one gift that I had finished well in advance of the holiday rush!  I made each of them this fold-up personalized "picture frame" that they could set on their desks in their apartments.  They both turned out really cute and I think they will like them.

The first thing that I did was cut squares out of mat board to become the base for my pictures.  They have pre-cut kits at the craft store that you can buy but I had some of this leftover from another project so I just cut my own.  I then covered the front and back with paper and punched holes in both sides (except the front cover and back cover which only need holes punched in one side.)  I then mounted my pictures in the center of each page and tied them all together with some twine.   
The final touch that made these really personal was actually on the back.  I put these little envelopes so that each person could write a note to them and put it on the back of their picture.  This way they could always have a little piece of home with them!
These turned out really adorable and were pretty simple to make.  You could certainly embellish them more than I did but they're boys and I figured in their case the simpler the better.  The best part about them is that they fold up and so they are really easy to store and move around.  I hope you all have a Happy New Year and can't wait to see what new adventures this year brings!

Friday, December 16, 2011

Christmas Goodies!

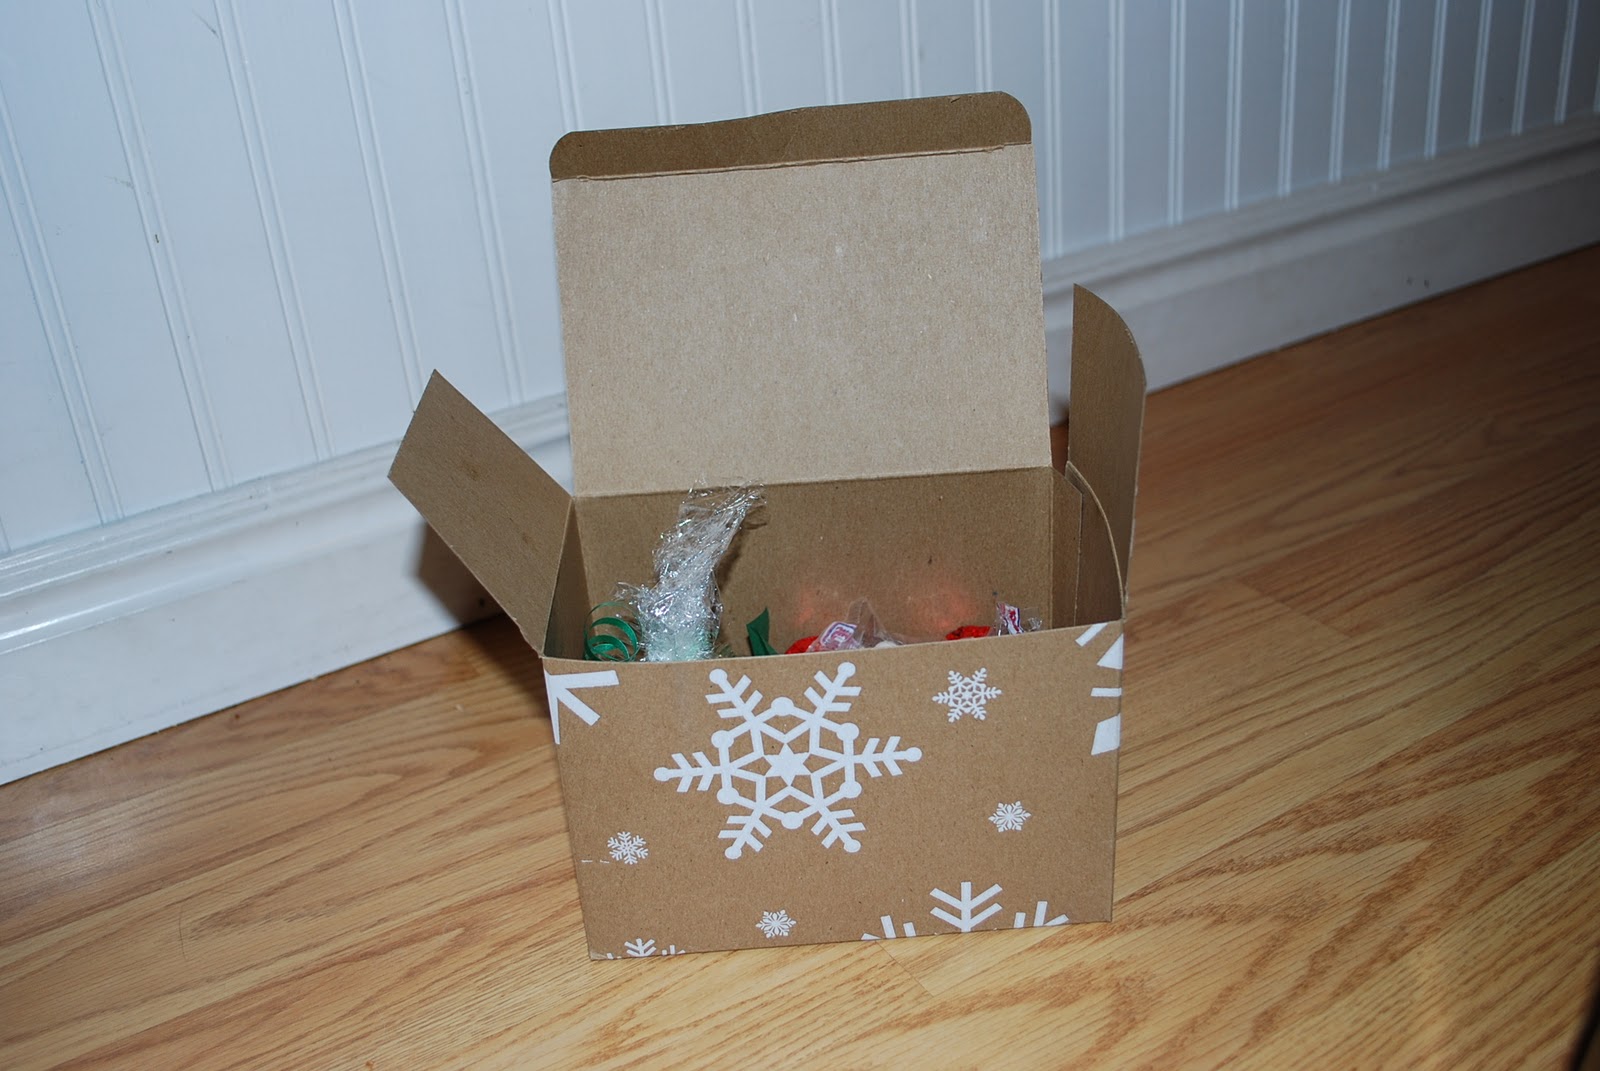
This week I was helping my Dad get gifts together for the people he works with.  I found these awesome little goodie boxes at my local xpedx store (I love that place by the way, they have just about every kind of bag, box, envelope, or paper you could think of.  I'm like a kid in a candy store there!)  We decided to fill them with some home made cookies and some fun holiday candy.  I decided to use some of my personal favorites including, peanut butter cups, almond roca, and peppermint balls. 
After the cookies had cooled I wrapped them in some plastic wrap and tied a piece of ribbon around the top.  I put them on one side of the box and then added a piece of tissue paper to hold our other little goodies on the other side.  I ended up using 6 peanut butter cup, 6 peppermints and 2 almond rocas along with 5 cookies per box.
After we had finished assembling them we simply stuck a tag on the top of the box and they were ready to deliver.  It ended up being really simple but turned out so cute!
I wanted to share my cookie recipe with all of you also.  I love this recipe, I got it years ago and have been making them this way ever since.
Chocolate Chip Cookies
1 1/2 cup sugar
2 cups brown sugar
4 cubes butter or margarine
3 eggs
2 cups chocolate chips
6 cups flour
2 tsp. vanilla
1 1/2 tsp. salt
1 1/2 tsp. soda
1/2 cup oatmeal
Cream together sugars and butter.  Add eggs and vanilla.  Then dry ingredients.  Mix Well.  Then add chocolate chips and oatmeal.  Spoon onto greased cookie sheet.  Bake at 350 degrees for 12 minutes.
(I make these in my Bosch mixer but I'm sure a kitchenaid would work also.)
Happy baking!

Saturday, December 10, 2011

DIY Peppermint Topiary

The other day I came up with this fun idea for a homemade topiary that looks like a peppermint.  My Mom needed an idea for gifts to donate to our local festival of trees and using what we had around the house I came up with these.  They turned out really cute and only took me about an hour to make!  We used foam core board, a bamboo skewer, pages from an old book I use for crafts, a little bucket, and some red paper.  First I cut a circle out of the foam core the size of the peppermint, then you take pages from the book and tear them into small pieces (the trick is you want them to be small enough that you can't read whole sentences but big enough that it doesn't take a ton of time to cover your circle).  Then you glue them onto the front and back making sure that you cover the whole circle.  I didn't worry if the paper went over the edge because it was really easy just to trim it after the glue dried.
The next step is to cut peppermint swirl shapes out of your red paper.  I eyeballed the first one and then traced it to make the rest.  I ended up with 5 "swirls" on each side (so 10 total).  Then you glue those on top of your paper covered circle.  I then modpodged on top of the whole thing once everything was glued on.
You're almost done now!  Next I stuck the skewer in the bottom of the circle and then stuck it in a piece of floral foam that was glued to the bottom of my bucket.  To finish it off we also modpodged some vintage Christmas pictures to the bucket, but you could use any type of container you wanted.  We also added a piece of ribbon around the skewer and glued some red twine around the edge of the peppermint because it gave it a more finished look.
All in all it was an awesome and inexpensive Christmas decoration!  I love the vintage feel of it with the old book pages and vintage holiday images.  If you would rather have it more modern you could always use a shiny metal bucket and just plain white paper, there are lots of ways you could personalize this project!  Also a little tip I thought I might add, if you have problems using an actual book you can color copy the pages and use those instead.  That way you don't have to rip up a book.  And here is the finished product!  I hope you all enjoy the tutorial and fill your home with Christmas cheer!

Friday, October 28, 2011

Getting back into the swing of things

For those of you who don't know I just had a baby!  Which is one of the reasons why this blog kind of got pushed to the back burner for the past year.  My little guy was born in July and I think I'm getting the hang of this new Mom thing.  I am certainly quite a bit busier then I used to be but I am enjoying it.  I'm really excited to get back to this blog and am hoping to keep up with it.  I'm going to be sharing DIY ideas, inspiration, life, and whatever else tickles my fancy.  I hope that you all continue to check back often and enjoy reading what I have to say as much as I enjoy writing it!  Well I'll see you all again soon!

Wednesday, September 8, 2010

My Lamps

As I'm sure you all have noticed by now, I didn't get a post done about my lamps when I said I would. I've been so busy that I haven't had time to even think about it again up until now. I'm going to do better and as promised here is my post about my lamps!

So we have been looking for some table lamps for a while and I haven't found any that I really liked...or that I liked the price on. I've been watching at our local thrift shop known as Deseret Industries for a couple of weeks and I finally found the perfect lamps. At first I thought the bases were the same but as I looked at them I noticed that they were slightly different but both were adorable and in perfect condition. Then I started browsing the lamp shades to see if I could find something with some character and sure enough I found the two perfect shades, it must have been my day. One was an antique and the other was plain cream and just needed removal of some ruffle around the bottom. The best part...the price. Here is a rundown of my total cost for this project:
2 lamp bases- $6.00 ($3.00 a piece)
Antique lamp shade- $.50 (that's right 50 cents!)
Ruffle shade- $1.00
In total for two cute lamps that added some much needed charm to my previously bare living room I spent $7.50! I was ecstatic! After some quick cleaning they were perfect! And that ruffle was barely holding on so it only took me 30 seconds to rip it off. Enjoy the pictures!
Once I got my bird lamp on the side table it looked a little short, and lonely. So I quickly looked around the room and it wasn't long before I found some more accessories that made it look so much better.

Wednesday, August 25, 2010

Lamps

I've been working on a project that I'm excited to show you all. I'm just finishing up tonight and can hopefully get pictures taken to post for my Fabulous Friday post this week! But to give you a hint about what it is I'm doing a post about lamps. Lighting is extremely important in any design. Lamps specifically though are something that are not too expensive that can completely finish off a design. With a lamp you can add color, drama, glitz and glam, and character to any room. They're also a lot easier to install then any other type of lighting, and are easiest to change if your tastes change. It's much easier to switch out a lamp shade or spray paint the base a new color then it is to remove a sconce or ceiling mounted light fixture. I found a few awesome inspiration pictures to show you just how flexible and vibrant lamps can be. Look back tomorrow for my own lamp project!Use them to add color to a peaceful bedroom.Try something different and put the lamps behind the couch instead of on end tables.Lamps can also add symmetry and a sense of balance to a room, so instead of mixing try matching!
Add a lamp to the entry of your home. Not only can it add character and something interesting, it also can light up a dark entry and make it seem much more welcoming.

Tuesday, August 17, 2010

Lonny

The newest issue of Lonny was released this week. Be sure to go check it out, they always have some really interesting articles and the best part is that it's free! You can't beat that. I hope you're all having a fantastic summer. I've also decided to change the fabulous Friday post to every other week and then do more posts in between. I was spending all my time finding something for that one post that I missed all the other days of the week! I'm also working on some fun room's on polyvore so be sure to look for those coming up shortly. Enjoy!

Friday, August 6, 2010

Fabulous Friday

This Friday I wanted to share some inspiration for some outdoor covered porches. Now that it's nice enough to spend the evening outside, I just can't help but wish I had one of these where I could just curl up in a chair and read a nice book while listening to the sounds of nature. I've been working with my very first client this week, they're building a house is a quaint country town and one of their requirements was that they have not only a covered porch out front but a covered deck in the back of the house. I hope you enjoy the inspiration I've found!

Friday, July 30, 2010

Fabulous Friday...Etsy Finds

Hey everybody! So sorry I missed the fabulous Friday post last week, I was enjoying a state holiday and relaxing with my husband. Anyways, I'm back this week and I'm excited to share some fabulous treasures I found on etsy! My favorite season is coming up in just over a month so that was inspiration for this post. Autumn! I love the colors, and the smells, and everything that fall brings with it. So here are some etsy finds that are getting me even more excited for fall to be here. Enjoy!
1. 2. 3. 4. 5. 6.

Friday, July 16, 2010

Fabulous Summer Beach House

Check out this way cute beach house that is featured on House Beautiful this month. I love how bold the colors are. It is just so much fun and reminds me of everything that I love about summer. One thing that I really love about this house is that they painted all of the walls white and then added really bold colors and prints. It makes everything looks so clean and crisp and reminds me of what a beach house is supposed to feel like.

Friday, July 9, 2010

Fabulous Organizing Friday!

This next week will find me deep cleaning and organizing my house and my shed in preparation for a yard sale I'm having on Saturday. In my personal opinion there is just something so rewarding about cleaning and organizing. Your house just feels so nice when you're done and I always feel so good about myself when I look at everything I've accomplished. So this week I decided to share some of the fun tips about organizing that I found ! Enjoy! Find a way that works best for you to organize your media area. The family room always seems to be the messiest in my house because so much goes on in there. Have labeled baskets for games, cords, gaming systems or toys. That way clean up is a breeze and everyone knows where to find exactly what they're looking for. Also if you have bookshelves, limit yourself to what will fit on the shelf. Your shelves start to look cluttered when you stack on top of books or movies and in front of them.Create an entryway, whether at your front or back door that is functional and decorative. If you can't find a bench like this one or don't have room, then try hanging decorative hooks and a shelf. That way they won't take up valuable floor space, but you'll still have somewhere to organize coats, hats and bags.
Label a stack-able bin for recyclable items. Not only does this keep everything organized, it takes up much less space in your garage or pantry then if you were to have individual bins.

I hope these few simple ideas will inspire you to get organized! The best thing to remember though is that it has to work for you in order for you to keep using it, so tweak these ideas to work best in your house or come up with your own. I'd love to hear what works best for you!

Friday, July 2, 2010

Fabulous Indepence Friday

Happy Independence day everyone! I just feel like red, white, and blue decorations lend themselves to this month and what better to celebrate than our independence. So in honor of this weekend, here are some fabulous finds I found that you can incorporate into your celebrations. Happy 4th of July!

To make this adorable and unique floral centerpiece just use a foam floral ball and poke carnations in to cover the entire surface except the bottom, then fill a dish with water and set your ball of flowers inside. They should last up to a week like this.What a cute idea for a summer picnic! To get this look you simply need paper flag fans and then place them on the top of the place settings. What an easy and inexpensive way to decorate. Plus, if you or your guests get to hot, you all have your own personal fan.If you don't have an actual striped tablecloth then you can always find some fun striped fabric and drape it over a white tablecloth. I also thought it was really fun the direction that they laid the fabric, just added something different from what you would normally see.

[photos courtesy of Country Living]

Thursday, July 1, 2010

Sugar!

I have a friend in my neighborhood who has a personalized cake and cookie business named "Sugar". I was just checking out her blog and found out that she is doing a birthday giveaway! I was so excited and I knew I had to share with all of you! Be sure to head on over and check it out to see how you can get entered. Here are some of my favorites from her work, there were too many to just choose one!

Friday, June 25, 2010

Fabulous Finds Friday...First Summer Post

This week is the first week of summer, and it actually finally feels like summer. So for this weeks fabulous post I decided to focus on outdoor living and decorating. I love being outside and there are so many fun things you can do when it comes to decorating your outdoor space. Whether you're having a fun party, or just want a nice place to relax, I hope these ideas will inspire you to get outside and enjoy everything there is out there. Think of your backyard or patio as an extension to your house.I love the idea of hanging bunting flags for your party. They're so festive but simple at the same time. I also love those cute sunflower cupcakes, and putting them on a tiered stand is a great way to display them.Remember that if you want to put a table and chairs outside there is absolutely nothing that says you need to get a matching set or if you do get a set make sure you make it your own. These tables have so much personality!

LinkWithin

Related Posts with Thumbnails